Step 1: Start a new composition
Press the 'Files' button: .
.Click on 'Create New Composition':
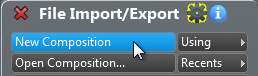 |
Close the panel.
Step 2: Set scale, tempo and signature
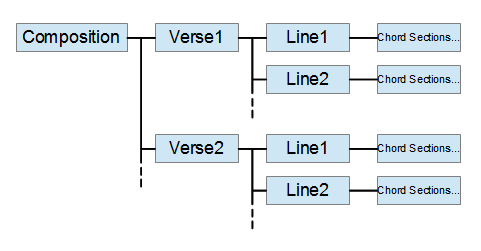
In RapidComposer the composition is a hierarchical structure as shown on this image:
 |
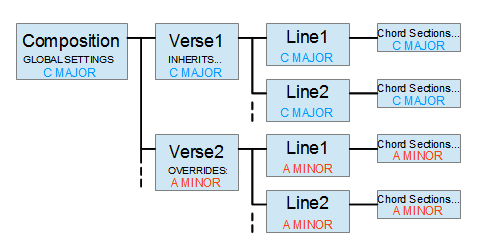
You can set properties (scale, chord, tempo, signature) on any level. Lower levels inherit these properties by default, but they can also override them. On the following image 'C Major' scale is specified at the composition level, but it is overridden by 'Verse2':
 |
The composition structure is presented as a collapsable list in RapidComposer. Click on the 'Structure' icon  to open the Structure Inspector.
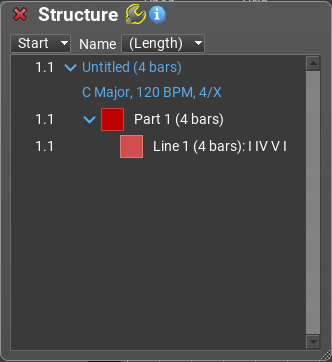 |
In the Structure Inspector you can add or remove lines and verses, and set scale, tempo and signature if you right click on any units. Now right click on 'Untitled' which is the highest level in the list. This will open another inspector:
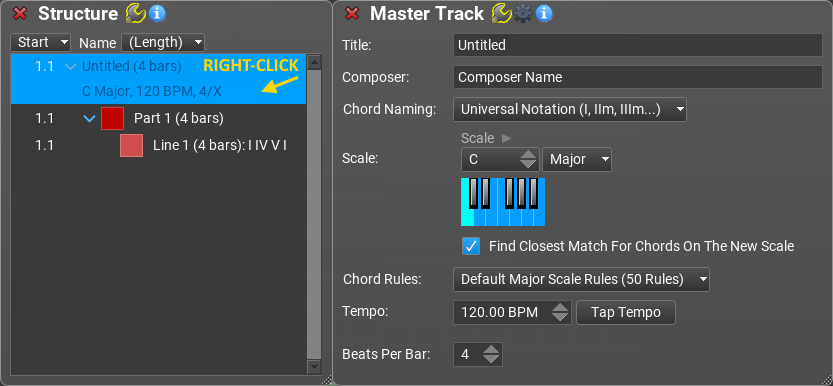 |
You can set the composition global scale, tempo and signature in this window, as well as composition title and composer name. You can choose whether to use absolute chords, or chords with scale degrees.
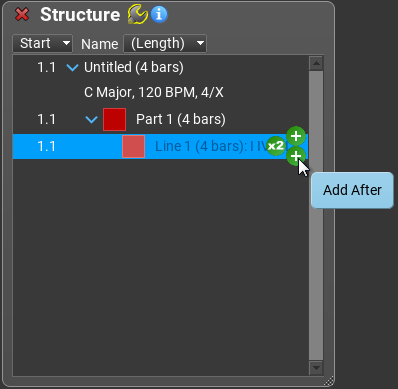
Step 3: Add a new line
Click on 'Line1' in the Structure Inspector. Click on the lower green '+' icon to add a new line below the existing line:
 |
The active view (that you edit on the composition workspace) is displayed with blue text in the list. By default the whole composition ('Untitled' on the screenshot) is displayed. Double-clicking on 'Line1' will display only 'Line1' in the composition workspace.
Step 4: Zoom And Resize
If you double-clicked on 'Line1', you can close the Structure Inspector. Now only 'Line1' is shown. Resize the track vertically by dragging the bottom of the track header. Zoom the timeline using Ctrl-drag on the timeline. You can make the line shorter or longer by dragging the right edge of the timeline:
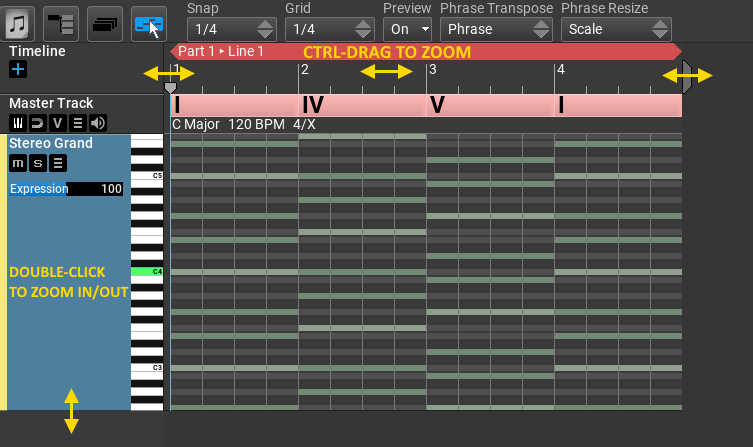 |
Hint: if you double-click inside the track header, the track is automatically zoomed to fill the workspace.
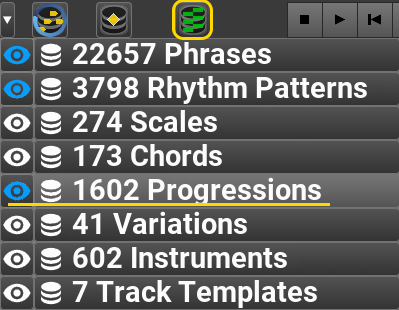
Step 5: Specify a chord progression
Click on the small button at the top left corner to open the browser menu. Here you can open/close browsers, and decide which browser icons to display in the top bar. Click on the 'eye' button for Progressions:
 |
Click on  to open the chord progression browser. Select a progression, and drop it on the Master Track as shown here:
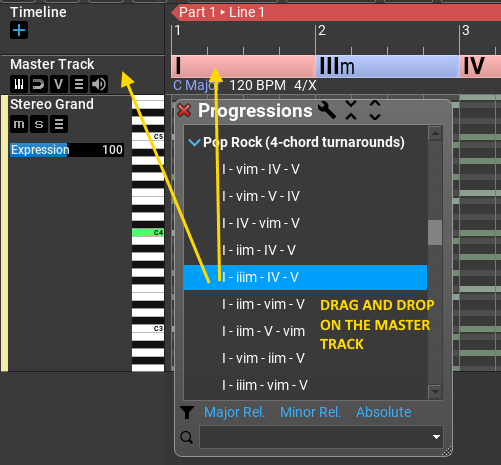 |
Step 6: Preview and edit chords
Select the track (click in the track header, e.g. on the Piano label). If you press 'H' the track will be filled with phrases that are suitable to preview master track chords. You can divide or join the chord sections by double-clicking. Move chord section boundaries by horizontal dragging:
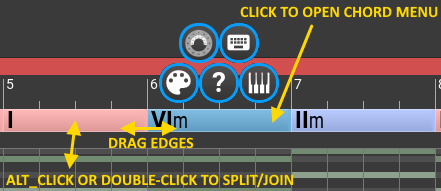 |
You can set the individual chords in many different ways: clicking on the chord offers chord suggestions, opening the chord selector, typing the chord name, or entering a chord from your MIDI keyboard. Right-clicking on a chord section which opens the Master Track Inspector
Step 7: Setting the track properties
Right click on a track header to open the track inspector, where you can set the name, colour, instrument, voicing, articulation and other properties for tracks. You can make percussion tracks, which are optimized for percussions, but are still phrase-based. Use the 'Acoustic Guitar' voicing if you want to use acoustic guitar chords. In this case the track will look up the master track chords from a guitar chord database and use the guitar chord notes instead of the keyboard chord notes.
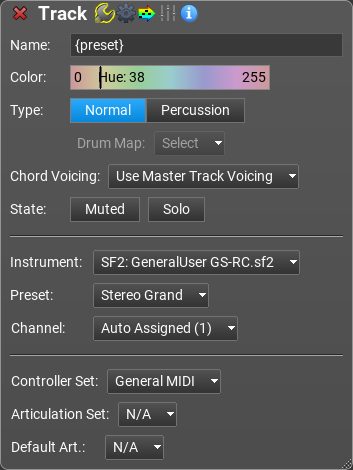 |
Step 8: Done! You can move on to the 'Working With Phrases' tutorial
This tutorial ends here, but there is still a lot to discover. Generally if you right-click on a track, phrase, master track, transport buttons, etc, an inspector window will open. At the top of the window you can choose whether to display the properties, operations or help for the clicked object. If you leave the mouse over a UI element, a help window will pop up. (You can turn off pop-up help in the settings when not needed anymore.) At the left bottom corner of the window you will find two small buttons that provide information about mouse operations and keyboard shortcuts.